Looking for a romantic and indulgent way to savor the deliciousness of Oreos? Your search is over, my friend. These whimsical chocolate covered oreo roses treats are a breeze to whip up and requires no baking. Whether you’re creating it with your little sweethearts or presenting it at a fancy soirée, this recipe is bound to delight and captivate and super handy in your recipe collection.


Download our gorgeous poster and learn more about the language of your favorite edible flowers to craft magnificent teas, salads, bouquets and more with beautiful intention.

Although this technically isn’t a “rose recipe” I wanted to let you know I have an entire category of real rose recipes, in case you are as smitten with eating them as I am. These would go beautifully with one of our rose milk tea latte, or served with Homemade Rose Icecream. Or during a party where you make distilled rose water at home.
Tools:
- Rose mold – The one I have holds 4 and is meant for ice cubes, but I tagged this one as it will allow you to make six at a time instead, which is what the recipe will yield. That way you don’t need to remelt your chocolate like I did when making mine. This is the rose mold I have if you’re interested.
- Microwavable bowl for melting chocolate.
- Spoon for stirring and dripping chocolate into the mold.

Ingredients:
I love a culinary delight that requires only two simple ingredients. Not only is it scrumptious, but it’s also easy on the wallet. As always, I have included detailed measurements in the recipe card below.
- Chocolate Chips or chocolate melts: You have the freedom to choose from a range of delightful chocolate options – white, milk, peanut butter, butterscotch, or semi-sweet chips. Or, if you’re feeling adventurous, opt for your beloved chocolate bar, as long as it measures up to 2 cups chopped. Let your heart and taste buds guide you on this journey. Chocolate melts typically melt better in general and come in all sorts of colors.
- Oreo Cookies: Literally any type of oreos work here. Want to try that new festive flavor? Love chocolate mint? The world is your oyster.
How to make them:
This is the type of recipe that’s impossible to mess up!
- Melt your chocolate: First, in a small microwave-safe bowl, add the chocolate chips. Microwave 30 seconds at a time stirring after each interval until smooth.
- Dizzle: some melted chocolate into your mold: Next, drizzle a little bit of melted chocolate into your rose mold.
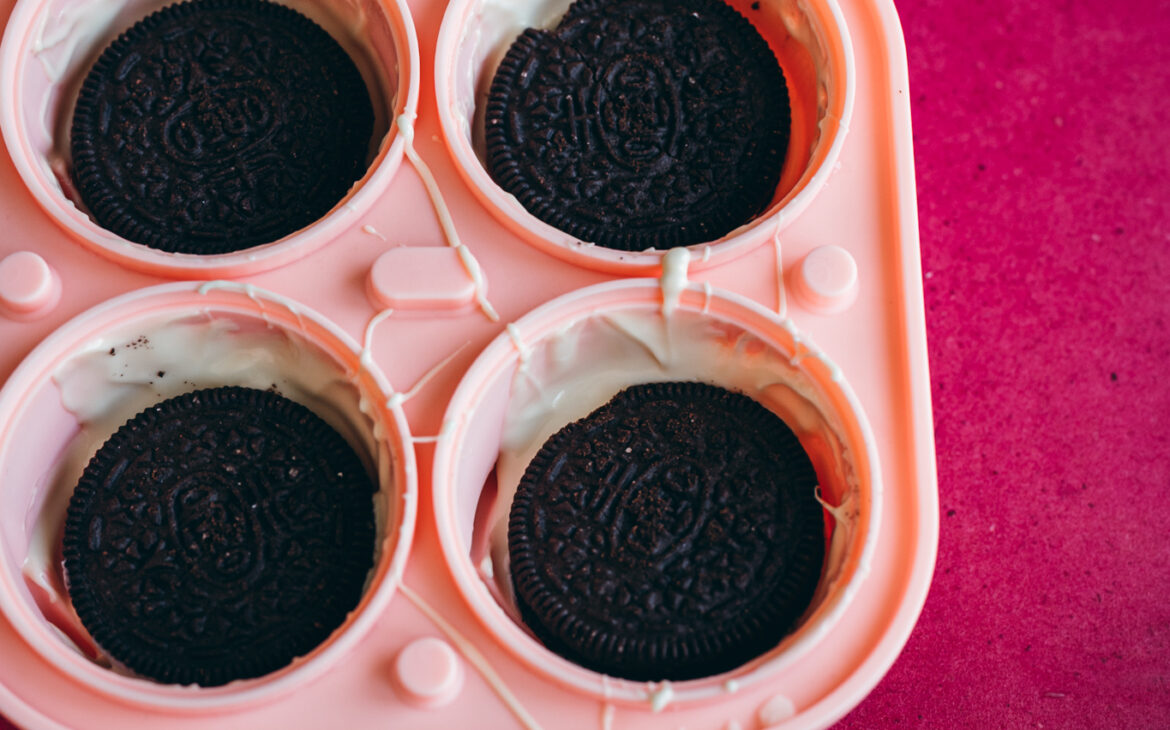
- Add your oreos: Place your oreos over the melted chocolate
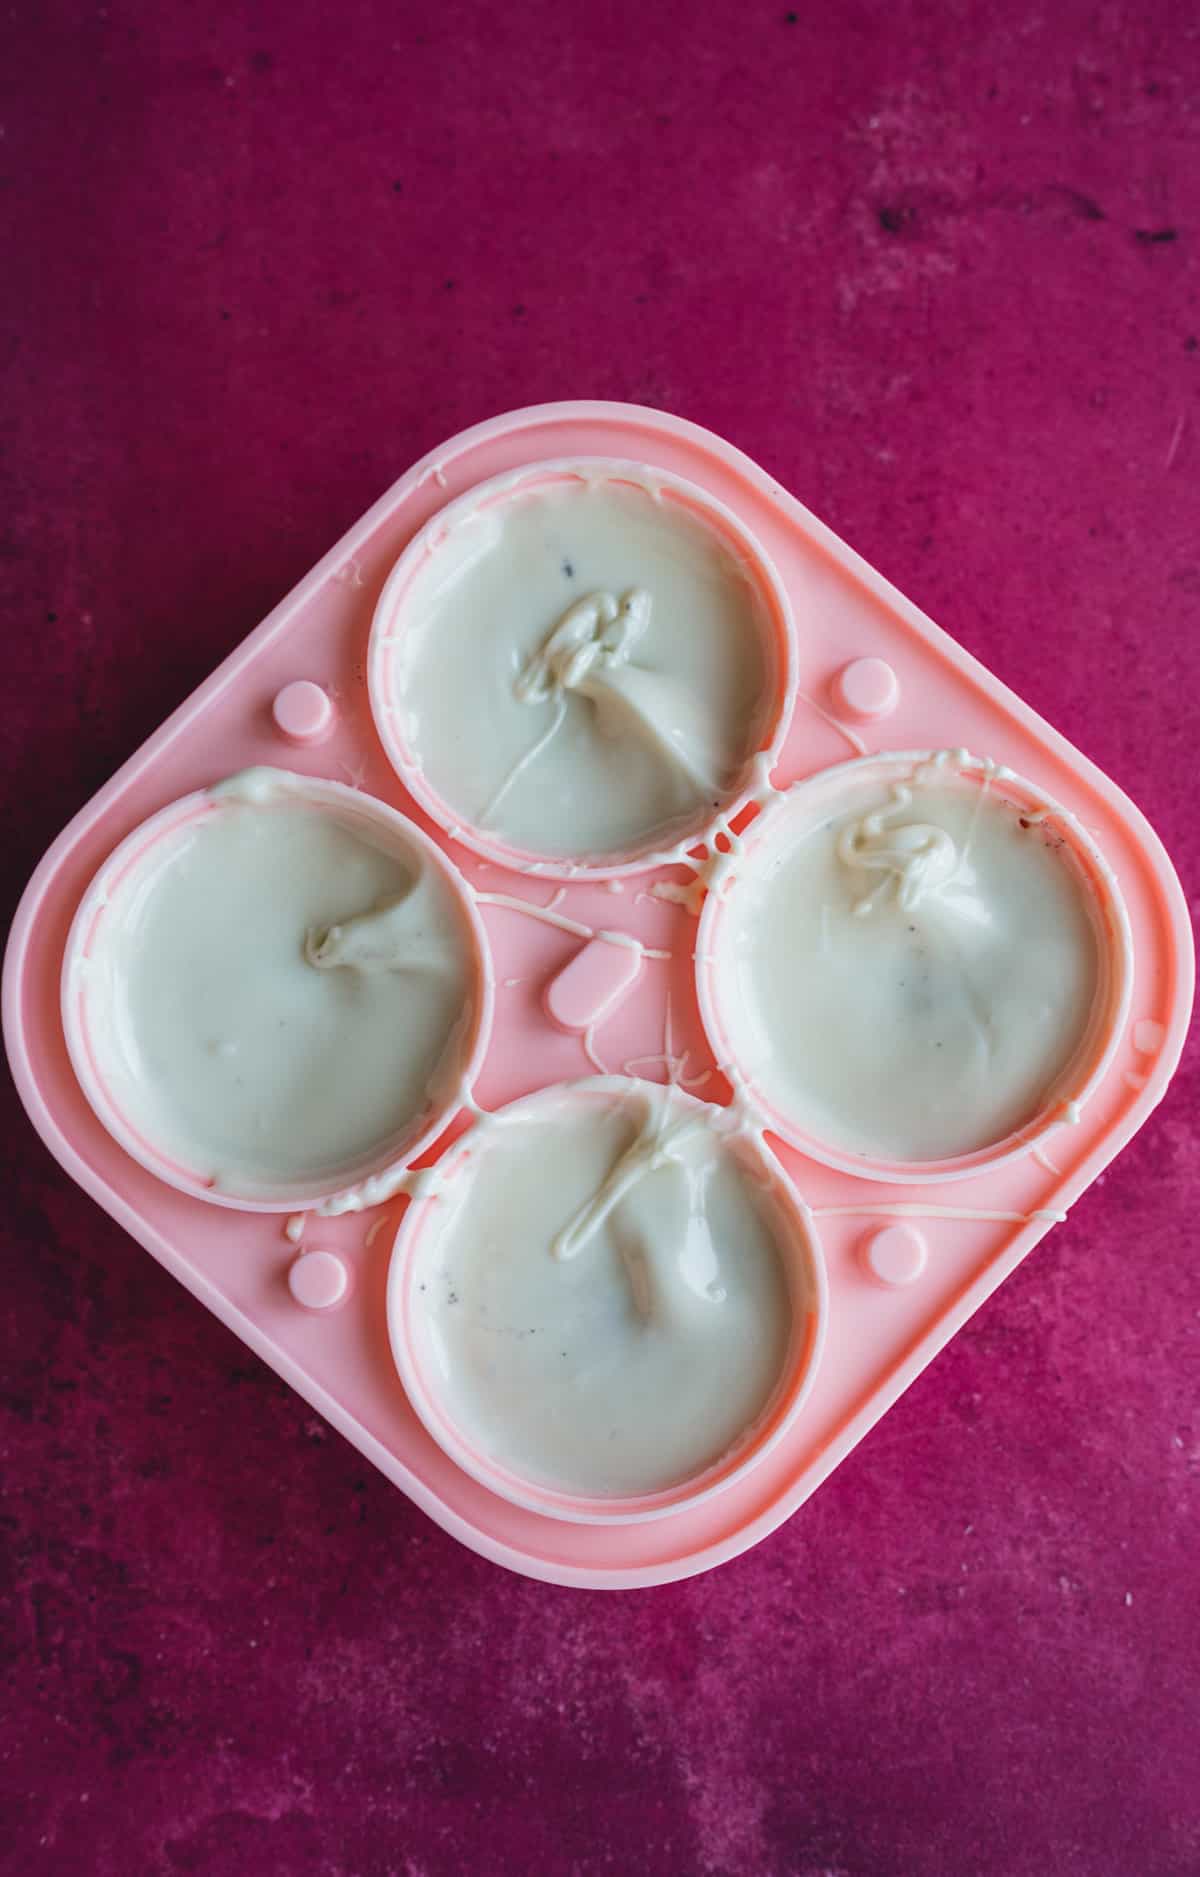
- Add remaining chocolate to coat: Evely pour the rest of the melted chocolate into the molds to cover the oreos.
- Move mold to the refrigerator: Let chocolate set for at least thirty minutes before popping them out of their mold.
- Remove the Oreos from the fridge: Carefully remove them from the mold. I’ve accidently broken one or two when doing this too quickly. Slowly and carefully, and they will be perfect!
- Store them in the refrigerator: In an airtight container when they’re done.


Watch the video:
Sometimes a simple visual really helps!
Frequently asked questions:
Can I make these without a mold?
You can make regular chocolate covered oreos, but not designed like a rose, unfortunately.
Can I make these with other molds?
You bet! Use other flowers or any shape!
How can I store them once their done?
Store them in an airtight container in the fridge for up to one month or freezer for up to three months. Simply move to room temperature to let them thaw overnight when ready to eat.
Shop the ingredients:

Click to save this recipe to your pinterest for later! And don’t forget to follow us on pinterest for lots of pretty inspiration, xo.


The printable recipe:

Chocolate Covered Oreo Roses
Equipment
- 1 rose mold
Ingredients
- 2 cups chocolate chips or chocolate melts of choice
- 6 oreo cookies
Instructions
- 2 cups chocolate chips or chocolate melts of choice
- 6 oreo cookies
Instructions:
- Melt your chocolate: First, in a small microwave-safe bowl, add the chocolate chips. Microwave 30 seconds at a time stirring after each interval until smooth.Dizzle: some melted chocolate into your mold: Next, drizzle a little bit of melted chocolate into your rose mold.Add your oreos: Place your oreos over the melted chocolateAdd remaining chocolate to coat: Evely pour the rest of the melted chocolate into the molds to cover the oreos.Move mold to the refrigerator: Let the chocolate set for at least thirty minutes before popping them out of their mold.Remove the Oreos from the fridge: Carefully remove them from the mold. I've accidentally broken one or two when doing this too quickly. Slowly and carefully, and they will be perfect!Store them in the refrigerator: In an airtight container when they're done.